I have recently started a small project from Deborah Kemball’s book Beautiful Botanicals. (www.deborahkemball.com) In her designs she uses lots of fine bias strips to make stems. She constructs her bias strips without the use of bias bars. This method appeals because it is less fiddly and you don’t have to labour over the preparation. In addition,because you don’t have to use your iron in the preparation, it is good for occasions when you are away from home. And you don’t run the risk of burning your fingers as you iron those tricky strips!
First of all cut your strips on the bias. This is important if you want to sew curves. (However, if you are using your strips for straight lines you can cut your fabric with the grain). Deborah recommends cutting strips at 3/8 of an inch which makes very fine bias strip. Experiment with different widths to achieve the look your prefer. For my project, I cut my strips 1/2″ wide.
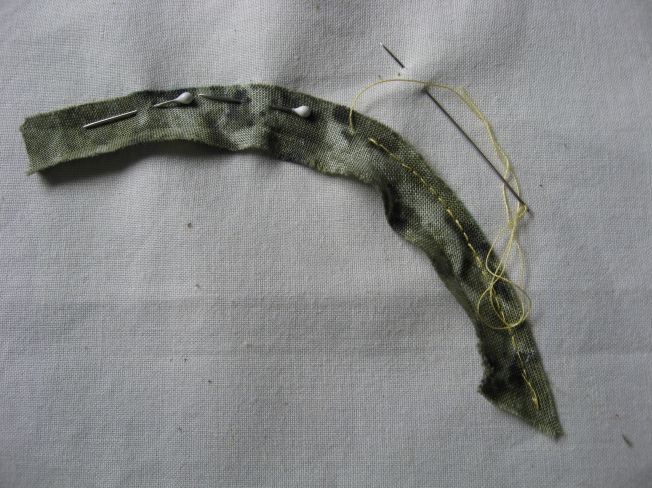
Mark your design, using your preferred method, on your background fabric. Take your bias strip and place it, right sides together, along the inside curve of the marked curve, as in the photo. It is important to sew the inside curve first, so that the stretch of the fabric can accommodate the larger distance on the outside of the curve.
Stitch about 1/8″ in from the edge, along the upper edge of the bias strip, using a neat back-stitch or running stitch. I use Aurifil Cotton in 50 weight for my hand applique because it is so smooth and fine. Here I have deliberately used a contrasting colour so that you can see where I have stitched.
Next, finger-press the raw edge up to the stitch line.
Now fold it over again so that the folded edge aligns with the marked curve on your background fabric and applique stitch it in place.
The finished curve looks like this.
If you are sewing a curve which waves in two or more directions, you must make each section of the curve separately, so that you are always sewing the inside part of the curve first. When you have finished one section, rotate your work 180 degrees and work on the next section.
The partially completed bias strips on my current project look like this:
And if you think this looks slightly familiar, it’s because it featured in my patchwork project pantry from a previous blog post!!


